Categories
Arcade

Sunset Riders repair

The first time I powered up the system it was totally dead. No video and the CPU would try to start then halt.

I removed and checked the main EPROMs 18E, 18G, 8E and 8G and was happy to find that they all verified ok, but all of them had bent legs which had missed the socket and folded up underneath the IC. Luckily the legs did not break off when straightening them out and reinserting them into their respective sockets.

Unfortunately someone had attempted a repair in the video section and had removed the SRAM and buffers at 11D, 12D, 13D and 14D. When removing those ICs they had damaged a number of traces. They had attempted to repair the traces, however their repair was far from successful as they had connected traces to the wrong locations.

I removed all these ICs again and repaired all the traces and installed IC sockets. I also tested the SRAM and the buffers and found that one of each of was faulty, which was not at all surprising seeing as they were Fujitsu branded, so I replaced them with new ICs.

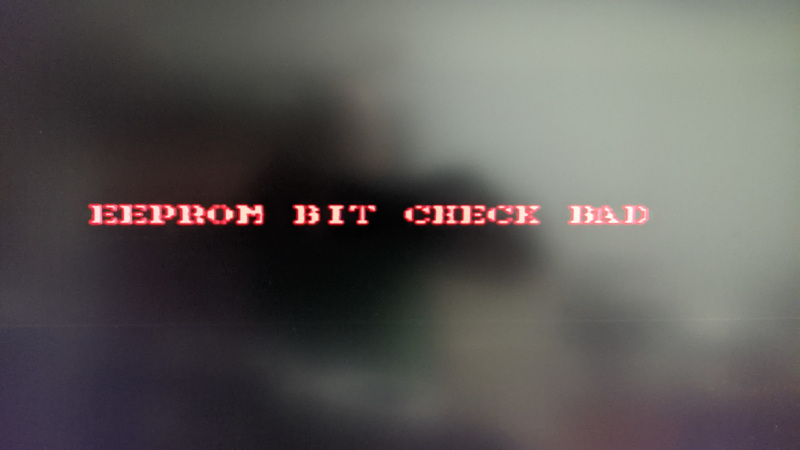
Happy that the previous repair attempt was now fixed, I moved to looking at the reason it was not booting. Checking the buffers at 13F and 14F showed data on the inputs but all the output lines were totally dead. Once again, they were Fujitsu, I removed and tested these buffers and they were both dead, so I replaced them and the system now booted, coming up with an error on the screen “EEPROM BIT CHECK BAD”.

I checked the serial eeprom at 15B and found that there was no activity so whatever was meant to be reading it was not working. Referring to the schematic shows that the eeprom is addressed by the 74273 at location 15C.

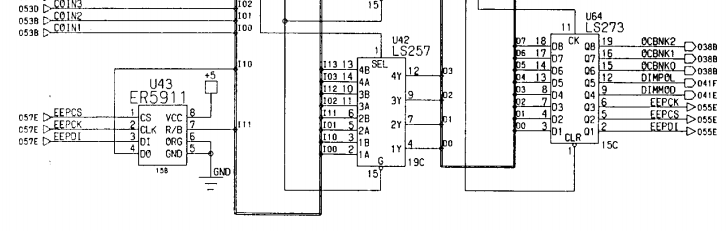
I piggy backed the 273 and checked around the eeprom again with the logic probe and this time I had a clock on pin 6, but other lines were still inactive. Not really all that surprising, so I removed and replaced the Fujitsu 74273 and then system booted past the eeprom bit check bad error and gave me a new error to investigate.

At first I was greeted with a checking eeprom screen. At this point I was thinking I had been lucky and the board was fixed, but that was not to be the case.

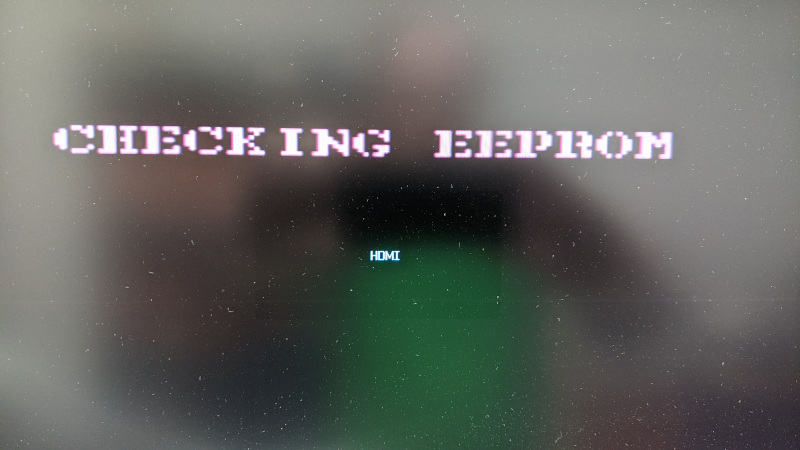
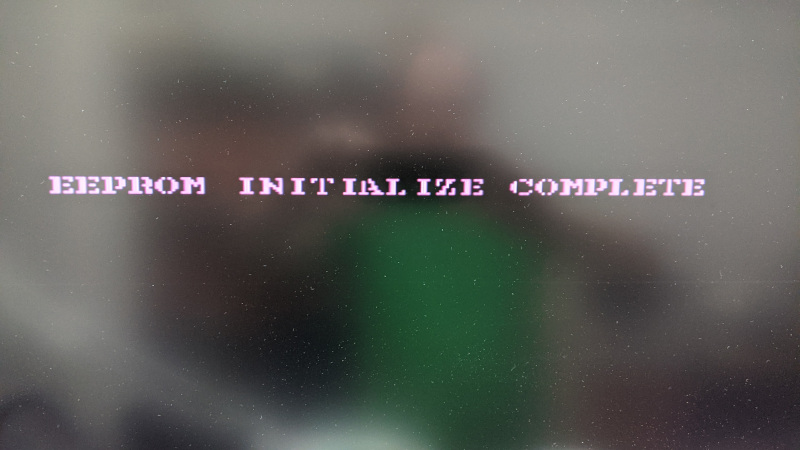
After about 10 seconds another screen saying eeprom initialize complete displayed.

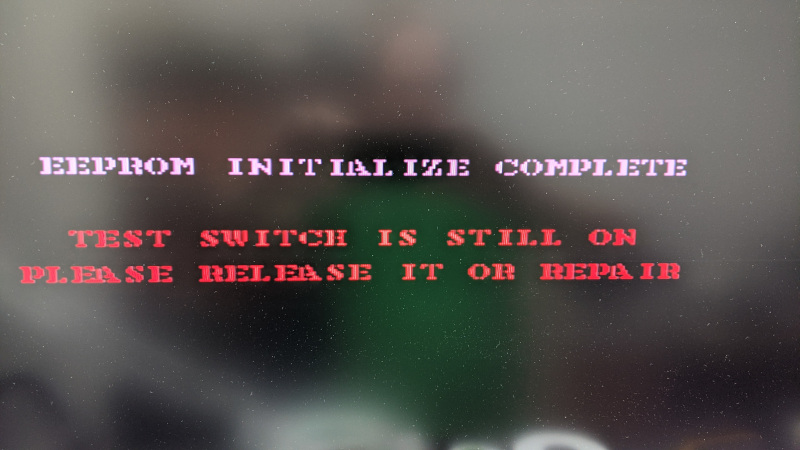
Then finally I was greeted with an error message saying that the test switch was still on.

A quick check of the schematic shows that the test switch goes into pin 13 of IC 18C and the data line goes out on pin 12.

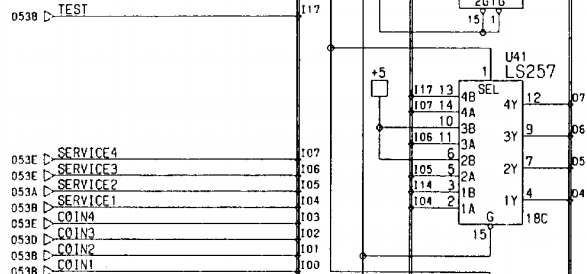
Probing those lines showed that the input was working fine, but the output had no activity. Time to replace another faulty Fujitsu IC.

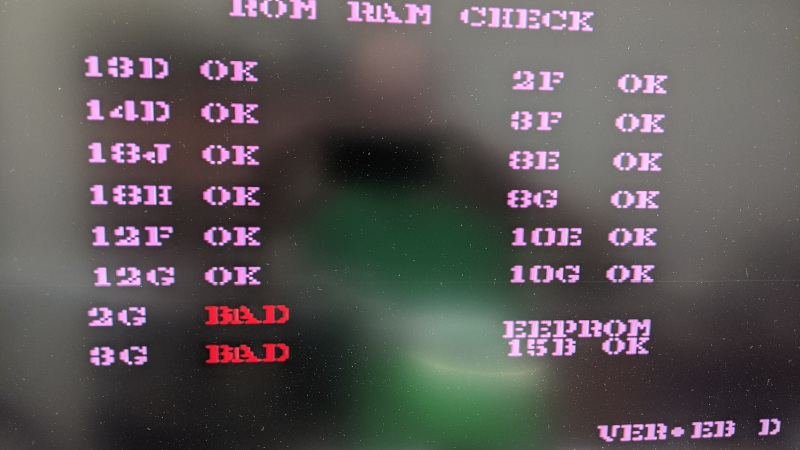
This time around the board booted to display the rom and ram check screen. Unfortunately it showed 2G and 3G were bad.

I began probing around those suspected bad SRAMs with the logic probe and found almost no activity whatsoever. Unfortunately the schematic I had did not show these SRAMs so I was unsure of where they went. However I had a hunch that two buffers at locations 8J and 8K probably had something to do with them and that they were likely to be faulty seeing as they were yet again, you guessed it, Fujitsu. So I piggy backed these two ICs, and this time I was greeted with a game screen. I replaced the buffers and turned the system back on and this time, I had no green or blue. It turned out that a number of 7407s at locations 8C, 9C, 10C, 11C and 12C had failed while I had been performing the repair. Not all that surprising given that they are all also Fujitsu. Rather than replacing just the faulty ones, I just replaced all of them which gave me back all the colours.

Now the game was running, but I could see there was still another fault. On certain screens there was a black bar.

Now the game was working I could go into the menu and test the mask roms to see if that was the problem. Unfortunately that was not to be. When pressing the test button, I could get into test, but the start button would not work. You guessed it, time to replace more Fujitsu ICs. After replacing most of the 74253 and 74257 ICs at locations 13B, 14B, 16C, 17C and 19C I was finally able to run the mask rom test and was surprised when it returned ok for all the roms.

Given the roms were all testing ok, I decided to review the schematic again and this time I notice the 74164 at location 16D, a serial in, parallel out shift register, of which output pin 11 goes to pin 7 on all three colour modules through a 7407.

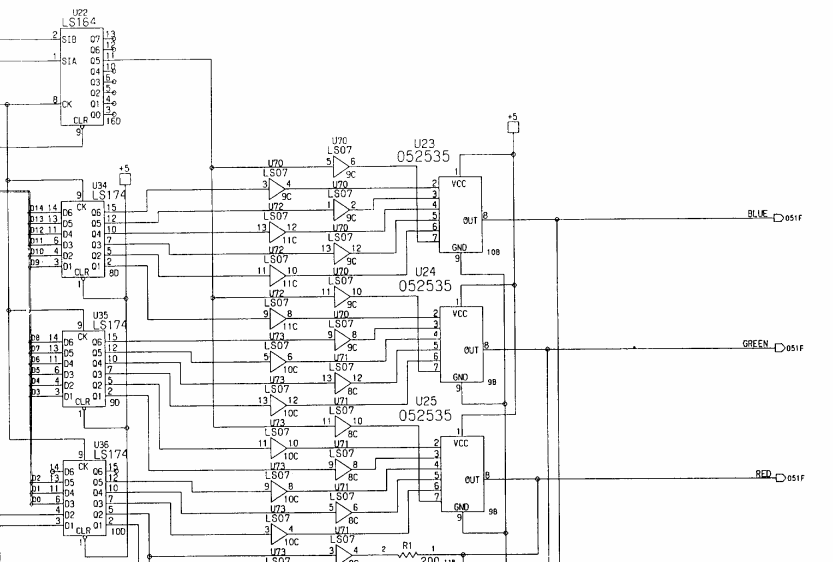
I put the logic probe onto pin 11 of IC 16D and found it to be totally dead. Checking the inputs on pin 1 and 2 showed plenty of activity. So I removed the ic and tested it in the programmer and sure enough it was completely dead. Replacing the 74164 with a new one, I powered up the system once again and this time it was working properly.

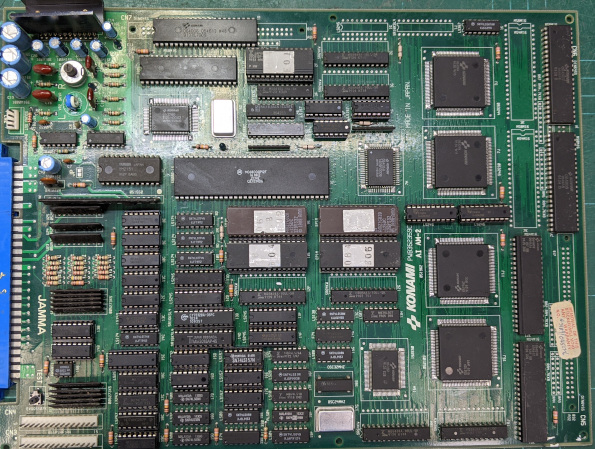
The final picture of the repaired game board.

Categories
Arcade Electronics

Konami 054544 / 054986A Reproduction Modules

Konami 054544 / 054986A Reproduction Modules

I have reproduced the Konami modules for the below games. Replacing these modules has become a must as the original modules are covered in a conformal coating and the surface mount electrolytic capacitors are failing and corroding the very thin tracks away. Left for long enough they will even damage the game board that they are installed in.

The modules do not come with the DAC or the ASIC chips, they need to be taken off the old module and installed onto the new one, so being comfortable with surface mount rework is a must to successfully change this module.

These reproduction boards have been designed so that all components are located on the top side of the board, unlike the original board and some of the other reproductions out there which has components on both the top and bottom of the board. Our modules use only Tantalum capacitors which eliminates the possibility of capacitors leaking corrosive materials in the event of failure.

054544 Module

  • X-Men
  • Xerex

You can purchase these modules from https://www.ebay.com.au/itm/Konami-054544-reproduction-sound-module/184482910615

054986A Module

  • G.I. Joe
  • Lethal Enforcers
  • Bucky O' Hare
  • Gaiapolis
  • Martial Champion
  • Metamorphic Force
  • Monster Maulers
  • Mystic Warriors
  • Polygonet Commanders
  • Premiere Soccer
  • Run & Gun
  • Violent Storm
  • Wild West C.O.W. Boys of Moo Mesa

You can purchase these modules from https://www.ebay.com.au/itm/Konami-054986-reproduction-sound-module/184520757193.

Categories
IT Stuff

LibreNMS ATEN 8216 PDU Support

Update: These changes have been accepted into the LibreNMS project so there is no need to manually add the below.

Below is the configuration files required for monitoring the power outlets on a LibreNMS system.

File: /opt/librenms/includes/definitions/discovery/atenpdu.yaml

mib: ATEN-PE-CFG_int.mib:ATEN-PE-CFG_str.mib
modules:
sensors:
power:
options:
skip_values:
-
oid: outletIntegerPower
op: '=='
value: '-2000000'
data:
-
oid: ATEN-PE-CFG::outlet
value: outletIntegerPower
num_oid: '.1.3.6.1.4.1.21317.1.3.2.2.2.2.99.1.4.{{ $index }}'
divisor: 1000
descr: 'Port {{ $outletName }}'
index: 'outletIntegerValueIndex.{{ $index }}'
low_limit: 0
high_limit: 2400
current:
options:
skip_values:
-
oid: outletIntegerCurrent
op: '=='
value: '-2000000'
data:
-
oid: ATEN-PE-CFG::outlet
value: outletIntegerCurrent
num_oid: '.1.3.6.1.4.1.21317.1.3.2.2.2.2.99.1.2.{{ $index }}'
divisor: 1000
descr: 'Port {{ $outletName }}'
index: 'outletIntegerValueIndex.{{ $index }}'
low_limit: 0
high_limit: 10
voltage:
options:
skip_values:
-
oid: outletIntegerVoltage
op: '=='
value: '-2000000'
data:
-
oid: ATEN-PE-CFG::outlet
value: outletIntegerVoltage
num_oid: '.1.3.6.1.4.1.21317.1.3.2.2.2.2.99.1.3.{{ $index }}'
divisor: 1000
descr: 'Port {{ $outletName }}'
index: 'outletIntegerValueIndex.{{ $index }}'
low_limit: 190
high_limit: 260

File: /opt/librenms/includes/definitions/atenpdu.yaml

os: atenpdu
text: Aten PDU
type: power
icon: aten
mib_dir:
- aten
nobulk: true
over:
- { graph: device_current, text: Current }
- { graph: device_voltage, text: Voltage }
- { graph: device_power, text: Power }
poller_modules:
applications: false
availability: true
bgp-peers: false
ipmi: false
mempools: false
mpls: false
ntp: false
os: true
ospf: false
ports: false
sensors: true
stp: false
wireless: false
discovery_modules:
bgp-peers: false
cisco-vrf-lite: false
cisco-mac-accounting: false
cisco-pw: false
cisco-cef: false
cisco-sla: false
cisco-cbqos: false
cisco-otv: false
cisco-qfp: false
fdb-table: false
ipv4-addresses: true
ipv6-addresses: true
mempools: false
mpls: false
ntp: false
ports: false
ports-stack: false
processors: false
route: false
sensors: true
storage: false
stp: false
ucd-diskio: false
vlans: false
wireless: false
discovery:
-
sysObjectID: .1.3.6.1.4.1.21317

You also need to upload the mib files to /opt/librenms/mibs/aten/

All the files can be downloaded from here.

Finally if you would like the devices logo to show as Aten, you will need to upload a logo named aten.png or aten.svg to the /opt/librenms/html/images/os/.

Categories
Climate Change

And now for something completely different…

Did I really just deliberately quote Monty Python in the title for this post? Yes, I certainly did. I use the quote to deliberately highlight that actual facts are the real casualty when it comes to the world wide main stream coverage of Climate Change.

The blame is being targeted squarely at CO2, a gas which cant be seen, tasted or smelt, yet is required for life to exist. A fact which I do not think I have ever seen reported is that there has been much higher levels of CO2 in the atmosphere in the earth's history. According to information on Wikipedia, levels have been as high as 6000 - 7000ppmv. Was mankind the cause of the increase in CO2 previously or was it simply the earth's ecosystem doing what it does and has continued to do for millions of years?

This page will contain links to actual information which is publicly available, yet is not reported by the main stream media. Whether this failure to report is due to them not wanting to go against some political agenda, an unwillingness to check the information is actually factual or some other reason I do not know and I am not going to speculate. I will likely be labelled as a climate denier, working for the oil companies or some how being associated or funded by the fossil fuel industry for posting this information.

One really good video which everyone should watch is by Physicists Willie Soon and Elliott Bloom. They talk extensively about many different aspects of Climate Change and the misinformation being reported.

A very interesting video is on the Youtube channel Conversations That Matter with Dr Patrick Moore where Dr Moore talks about the Carbon Dioxide. He discusses that over the previous 600 million years, for which we have a reasonable record, the earth reached a level of only 180ppmv which is just 30ppmv above the death of plants.

According to Michael Mann and his hockey stick graph, which is widely used by the IPCC and main stream media in general, the earth has been in an incredible major heating event for many years. Yet an investigation by Climate Discussion Nexus Hide The Decline has revealed many discrepancies and omissions along with what could only really be called fraudulent behaviour.

Further to the investigation on the Mann hockey stick graph, the Climate Discussion Nexus also did an investigation into the saying 97% of the workds scientists agree on the science.

Professor Roy Spencer spoke at a conference in July 2019. He talks about the actual recorded data and the dependencies between the climate models and the observed data from the troposphere. He discusses that the climate models show that the warming should be higher in the troposphere than anywhere else. Over the 40 years of recordings, the data shows a 0.13C rise per decade, or a faction of a hundredth of a degree per year.

Below is a slide from Professor Roy Spencer's talk which shows tha actual observations recorded, being the thicker red and blue lines and the thick green line being the reanalysis of all the observable data, versus the climate models with an average of all 102 models being the thick black line.

An informative talk about Climate Change is by Steven F. Hayward, Pepperdine University He talks extensively about the realities of what would be have to be achieved to actually meet the targets which are being pushed onto us.

Sir Richard Attenborough is very well known for his wildlife and planet documentaries and most people would not think there was a need to fact check anything which he says, yet a recent video shows the many failures of the Sir Richard Attenborough and his team to check the facts about what he is narrating and is well worth a watch. After seeing the errors and traumatising images shown in some of these documentaries, its not surprising there are so many children with the so called eco-aniexty, and are so brainwashed into believing the narrative which is being fed to them by main stream media and even the education system. Critical thinking used to be taught as a good thing, yet now you are not permitted to question Climate Change in the classroom. I used to have a lot of respect for Sir David Attenborough, but that respect has diminished over recent years due to the factually incorrect information which he is spreading and continues to push to the public in general.

More videos worth watching

Peta Credlin

https://www.youtube.com/results?search_query=peta+credlin+climate+change

Australian public are being fed that bushfires and climate change are the same thing

Paul Murray

https://www.youtube.com/results?search_query=paul+murray+climate+change

Australians 'are not silly' and won't buy into climate change 'hysteria'

Alan Jones

https://www.youtube.com/results?search_query=alan+jones+climate+change

Climate change has become a 'new religion'

Categories
Electronics

Component Equivalents

This page is dedicated to listing any equivalent or replacement components which I come across. Like the post dedicated to the DAP008 which turns out to be a perfect replacement for the LD7575 pwm. If there is a datasheet available, you will be able to click the part number to view it.

Original Equivalent Notes
LD7575PS DAP008
DS9214 FP6321
FDMS8670 IRFH5302
AIC2858F DS8293A The resistor divider may need to be adjusted due to the slightly different feedback voltage. FB of the AIC2858F is 0.925v and the FB of the DS8293A is 0.8v. So the output of the replacement is likely to be too low.

Categories
IT Stuff

mcp23x17 php class library for Raspberry Pi

I recently had a job which required me to utilise a bunch of Microchip's MCP23017 16-Bit I/O Expander with Serial Interface. I needed to use a web interface to control the I/O ports, and after spending a bit of time looking around online, I found quite a number of Python modules and a few written in C, but not a lot for php. Dont get me wrong, there are a few around, but most of the ones I found are integrated into other systems and I gave up looking at splitting the code out and ended up writing my own. I decided to post the code to GitHub under the GPL3 license for others to use for free if they choose to.

https://github.com/cwispy/mcp23x17

The module uses the i2c-tools. The README.md file on GitHub provides details on how to install these tools, and how to add the apache webserver to the i2c group so it has permission to read and write from the i2c bus.

Categories
Fortigate

IPS Rule to detect and block DNS Recursion

Over the weekend we were notified that our Windows DNS servers were being used in a "Open recursive resolver used for an attack". This is really a mistake on our part for putting the authoritative and recursive services on the internet facing systems, something we will have to change. Also because Windows DNS does not have ACL's like those that exist in Bind and PowerDNS etc, its not a simple case of adding the authorised ranges to the ACL allow recursion.

What I ended up doing was to write a couple of IPS rules to match requests with the DNS Query Flags of 0x0100. I also check for more than 5 requests per minute per source IP and when I get a match to both, I quarantine the source IP for a period of time. Since implementing this it has been working extremely well. I have only applied this rule to the rules pointing to our Windows DNS Servers and not our Linux DNS Servers.

This is the flags of a recursive DNS query.

dns_query

Here is how its done from the command line. Note this is on FortiOS Version 5.0 patch12

config ips custom
edit "MS.DNS.Recursion.Requested"
set action block
set comment ''
set severity info
set signature "F-SBID( --attack_id 8976; --name \"MS.DNS.Recursion.Requested\"; --ipver 4; --protocol udp; --service DNS; --pattern |0100|; --distance 2,packet; --flow from_client; --rate 5,60; --within 2,packet; --track src_ip; --log dns_query;)"
next
edit "MS.DNS.Recursion.Requested.V6"
set action block
set comment ''
set severity info
set signature "F-SBID( --attack_id 7731; --name \"MS.DNS.Recursion.Requested.V6\"; --ipver 6; --protocol udp; --service DNS; --pattern |0100|; --distance 2,packet; --flow from_client; --rate 5,60;--within 2,packet; --track src_ip; --log dns_query;)"
next
end

ips.sensors.1


Now to add the IPS Sensor rule.

config ips sensor

edit "Windows DNS Servers"
set comment "Block clients that are not authorised for DNS queries"
config entries
edit 4
set action block
set log-packet enable
set quarantine attacker
set quarantine-expiry 60
set rule 8976 7731
set status enable
next

edit 2
set action block
set log-packet enable
set protocol DNS
set quarantine attacker
set quarantine-expiry 30
set severity medium high critical
set status enable
next

edit 3
set protocol DNS
set severity info low
next
end
next
end

ips.sensors.2

Finally the Firewall rule.

config firewall policy
edit 292
set srcintf "wan1"
set dstintf "LACP1"
set srcaddr "all"
set dstaddr "Windows DNS"
set action accept
set schedule "always"
set service "DNS"
set utm-status enable
set ips-sensor "Windows DNS Servers"
set profile-protocol-options "default"
next
end

ips.firewall.rule


This is the end result.

ips.log

Categories
Electronics

Modifying a Zax ITG3 HDD!

Recently a friend received a hard drive from a client which was out of an In The Groove 3 (ITG3) dance machine. The system had been supplied by Zax Amusements. The reason the customer sent the hard drive in was so that my friend could install an updated video driver to support the Nvidia GT210 because the customer was unable to do so. After a bit of investigation, we discovered the reason the customer was having trouble is because Zax Amusements have protected the system drive using Faronics Deep Freeze. On top of this they have also encrypted the ITG3 partition with True Crypt. While I do understand the protection of the system drive in an Arcade machine that is never turned off properly, I can not comprehend the protection of the ITG3 game, which is Open Source and totally Free and is not their property to protect. Zax Amusements also run couple of custom executables, one of which checks the serial number of the HDD. Then on top of all of this, they have put in some weird key mappings into the registry to render the keyboard useless when your in windows.

My friend contacted Zax asking them for their Deep Freeze password so he could install the drivers and leave the system protected as it was. As we expected, Zax ignored the request, so I proceeded with removing the protection from the hard disk for him. In the end doing this was pointless as we ended up supplying a new version of the ITG3 hdd to the customer along with the usb hub and i-pac for the lights. The new system starts up in a fraction of the time of the Zax version.

I was going to release all of the information on how to do it here, but instead I am just going to recommend that any Australian operators with a ITG3 system who need service, contact Jomac. Jomac will be able to supply you with a version of the ITG3 system which runs a lot faster than the version supplied by Zax, and also allows the use of the USB ports for players to use their own songs on usb.

Categories
Electronics

Basic ULN2003 / ULN2803 Tester

A friend of mine was looking for a simple way of testing the ULN2803 IC's so I quickly threw together this circuit and built it on some vero strip board. I would use a 18pin Zif socket if you expect to be checking hundreds of IC's or you will probably be changing the IC socket pretty regularly. The circuit is powered by a single 5V 1A power pack.

uln2003-2803-tester

Parts List

D1 to D8 - 3mm Red LED

R1 to R8 - 56R 0.6W

R9 to R16 - 220R 0.6W

SW1 - Momentary Push Button Switch

U1 - 18pin ZIF Socket or 18 pin IC Socket

When testing an IC you will know there is a short if any of the LED's turn on without the button being pressed, and you will know there is an open if the LED's do not turn on when you press the button. To test a ULN2003 which is a 16 pin IC, put it into the socket towards the back of the socket leaving pins 1 and 18 of the socket empty.

Categories
Uncategorized

Mini PPPoE Server Howto for RedHat 7.3 + Radius Auth

This is here only for historical purposes. The information contained is well and truly out of date, but could be handy for reference purposes.

Date: 25-Oct-2002

1. Install RH 7.3 Installing as a server system works. These instructions should be the same for RedHat 7.2 as well.

2. Set and IP address on the primary NIC to say 10.0.0.1. This is the card that is visible to the internet.

3. Install the updated rp-pppoe from Roaring Penguin http://www.roaringpenguin.com/pppoe/. This was version rp-pppoe-3.5-1 as
of this writing.

4. Download the latest pppd via cvs from samba currentl its 2.4.2b1 as of this writing. I use rsync. Make a dir called
ppp2.4 and then issue the command

rsync -vrz ppp.samba.org::ftp/unpacked/ppp/ ./ppp2.4/

to download the source. You dont really need the -v in the rsync command, but that echos what its doing to the screen so
you can see whats happening.

5. Change to the ppp2.4 directory and then

./configure

make

make install

6. Edit /etc/radiusclient/radiusclient.conf. Set the primary and secondary authentication and accounting servers and hosts.
Watch that your using the right port numbers. If you have an old radius server it is probably using ports 1645/1646.

7. Edit /etc/radiusclient/servers and set the secret password and the hostname of the radius servers your going to
authenticate against.

8. Edit /etc/sysctl.conf and change the line net.ipv4.ip_forward = from 0 to one(1). This makes the system turn on routing
at boot up.

9. Edit /etc/ppp/pppoe-server-options and add proxyarp to the end of the file on its own line. Also add ms-dns {dns ip
addresses} after the lcp-echo-failure lines.

10. Edit /etc/sysconfig/network-scripts/ifcfg-eth1 and change the ONBOOT=no to yes and remove the dhcp from the BOOTPROTO= if
its there.

11. Start the pppoe-server. You will probably need to pass some parameters to it. They will most likely be -I eth1 -L {localip} and -R
{remoteippool}. So you will end up with something like /usr/sbin/pppoe-server -I eth1 -L 10.0.0.1 -R 10.0.0.150. This tells the server
to start serving out IP's to the clients starting at .150. Set the -L IP to the local IP of eth0. When your happy with the
startup parameters you will want to add this same line to /etc/rc.d/rc.local so that the server restarts after a reboot of
the server.

12. You should now be able to test the system. Try adding a user to the system as a user and then add the user to the
/etc/ppp/pap-secrets file. (this assumes you use a user called test with a password of test)

:adding a user:

adduser test

passwd test

:pap-secrets file:

"test" * "test"

13. Now tail -f /var/log/message on the linux system and try to connect to the server with a PPPoE client. If you've got it
right, you will be able to establish a connection.

14. Now add the line plugin radius.so to the file /etc/ppp/pppoe-server-options just before proxyarp.

15. Now test the logging on again with a valid radius user.

16. Congratulations your finished!!!

pppoe-server-options file looks like this:

# PPP options for the PPPoE server

# LIC: GPL

require-pap

login

lcp-echo-interval 10

lcp-echo-failure 2

ms-dns 10.0.0.5

ms-dns 10.0.0.6

plugin radius.so

proxyarp